
Situated in Kailua at the Luana Hills Country Club and Golf Course, Olomana is easily accessible. If you are planning to hike instead of golf, parking is not allowed on the country club's grounds, but parking just outside of the sentry station is permitted. A third-of-a-mile walk on a paved road past the sentry is the Olomana trailhead on the left marked by a white rectangular sign.
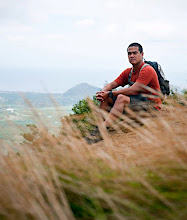
The initial portion of the trail offers a great warm-up of what lies ahead. The elevation gain is gradual under shady forest and on a somtimes rutted trail. After a passing a breezy grove of ironwood trees, the path begins to steepen, becoming less rutted. The majority of the ascent to the first peak is very shady. Near the top there are several rocky and rooty rope sections that have to be negotiated. If you've made it past these rope sections, the view at the top of the first peak -- the highest of all the three peaks -- is well-worth it after the 45-minutes of sweat dripping off of your chin. The 360-degree view is awesome. Looking to the ocean horizon is Kailua town, Lanikai, and the Mokulua Islands. To the right is Waimanalo town and Rabbit Island far in the distance. To the left is Kaneohe Bay; looking further are the towns of Kahalu'u and Waiahole; beyond is Kualoa and Chinaman's Hat. Behind is the towering Ko'olau cliffs and ridges with Maunawili Valley at its base. It is here where some hikers decide to turn around and head home, but if you're willing to add a few more hours of excitement to the hike, the second and third peak is your destination.
From the lookout the trail heads to a saddle between the first and second peaks. The trail then climbs steeply to the top of the second peak. A rope is conveniently anchored here to provide confidence. The top of the second peak is shady and cramped, and the view, unlike the first peak, is somewhat obscured by the vegetation. Getting to the saddle between the second and third peak involves an extremely steep descent along loose and crumbly rock. There are multiple ropes along this portion of the trail; however, it is advisable not to put all your weight on these ropes. Find your footing, and go slow. Be aware of other hikers below you. Rocks in this section of the trail are easily loosened and can hit someone below. Once you've reached the saddle between the second and third peak, take a look back at the second peak. It is jaw-dropping and hard to believe you have descended such a section. Now it's on to the third peak.
Pass a few rope sections until you reach a tall, odd looking rock formation with a hole in it. Here the trail jogs to the left around the rock formation. A rope is in place here for added security. After making it around this rock formation climb steeply with the aid of many ropes on what I consider to be the most dangerous part of the hike. The ridge here narrows to mind-boggling proportions with sheer drops on both sides. The scrambling along this steep and narrow ridge can be a nightmare to some, but as with all perilous trail sections, take it slow, fixate your eyes to the trail, and find ample footholds and handholds. You'll eventually find yourself on Olomana's third peak. A cache with a log book littered with stories and signatures of past hikers who made it to the third peak sits at the lunch spot. At this spot, an awesome view of Maunawili Valley offers a perfect opportunity to take pictures. Now rested, are you ready to do everything in reverse?
It is possible to descend the backside of the third peak, but it is extremely dangerous. It eventually bottoms out at a trail that leads back to the initial portion of the main trail going up to the first peak. I haven't done it yet, but I plan to some time in the future. Take a look at the video I shot as well. It was taken with my GoPro High-Definition Hero video camera


Island Trails - Olomana (GoPro POV) from Island Trails on Vimeo.
4 comments:
Hey I came across your site and liked what I saw. I decided to follow your blog. I recently did Olomana too. Did you make an entry in the book at the end? I most recently did the Oneawa Hills hike... it was awesome. Here's my account of Olomana... the day wasn't as nice as when you went though. http://bluegreenbetween.blogspot.com/2010/04/hiking-olomana-three-steep-peaks.html
Hey dude, what video editing software do you use? Been trying to find a decent one and haven't yet.
i was using windows movie maker, but now that i have a gopro high-def camera, i use imovie for mac...
Windows movie maker satisfies my needs for video. If you wanna make really cool stuff you should use Adobe Premiere (PC) or Final Cut (Mac).
Post a Comment